Products
Bundles
The Bundles feature allows you to bundle multiple products into a single item for sale.
Selling discounted bundles not only encourages larger purchases but also fosters customer loyalty, offering long-term benefits that outweigh short-term profit reductions.
How to add a product to a bundle
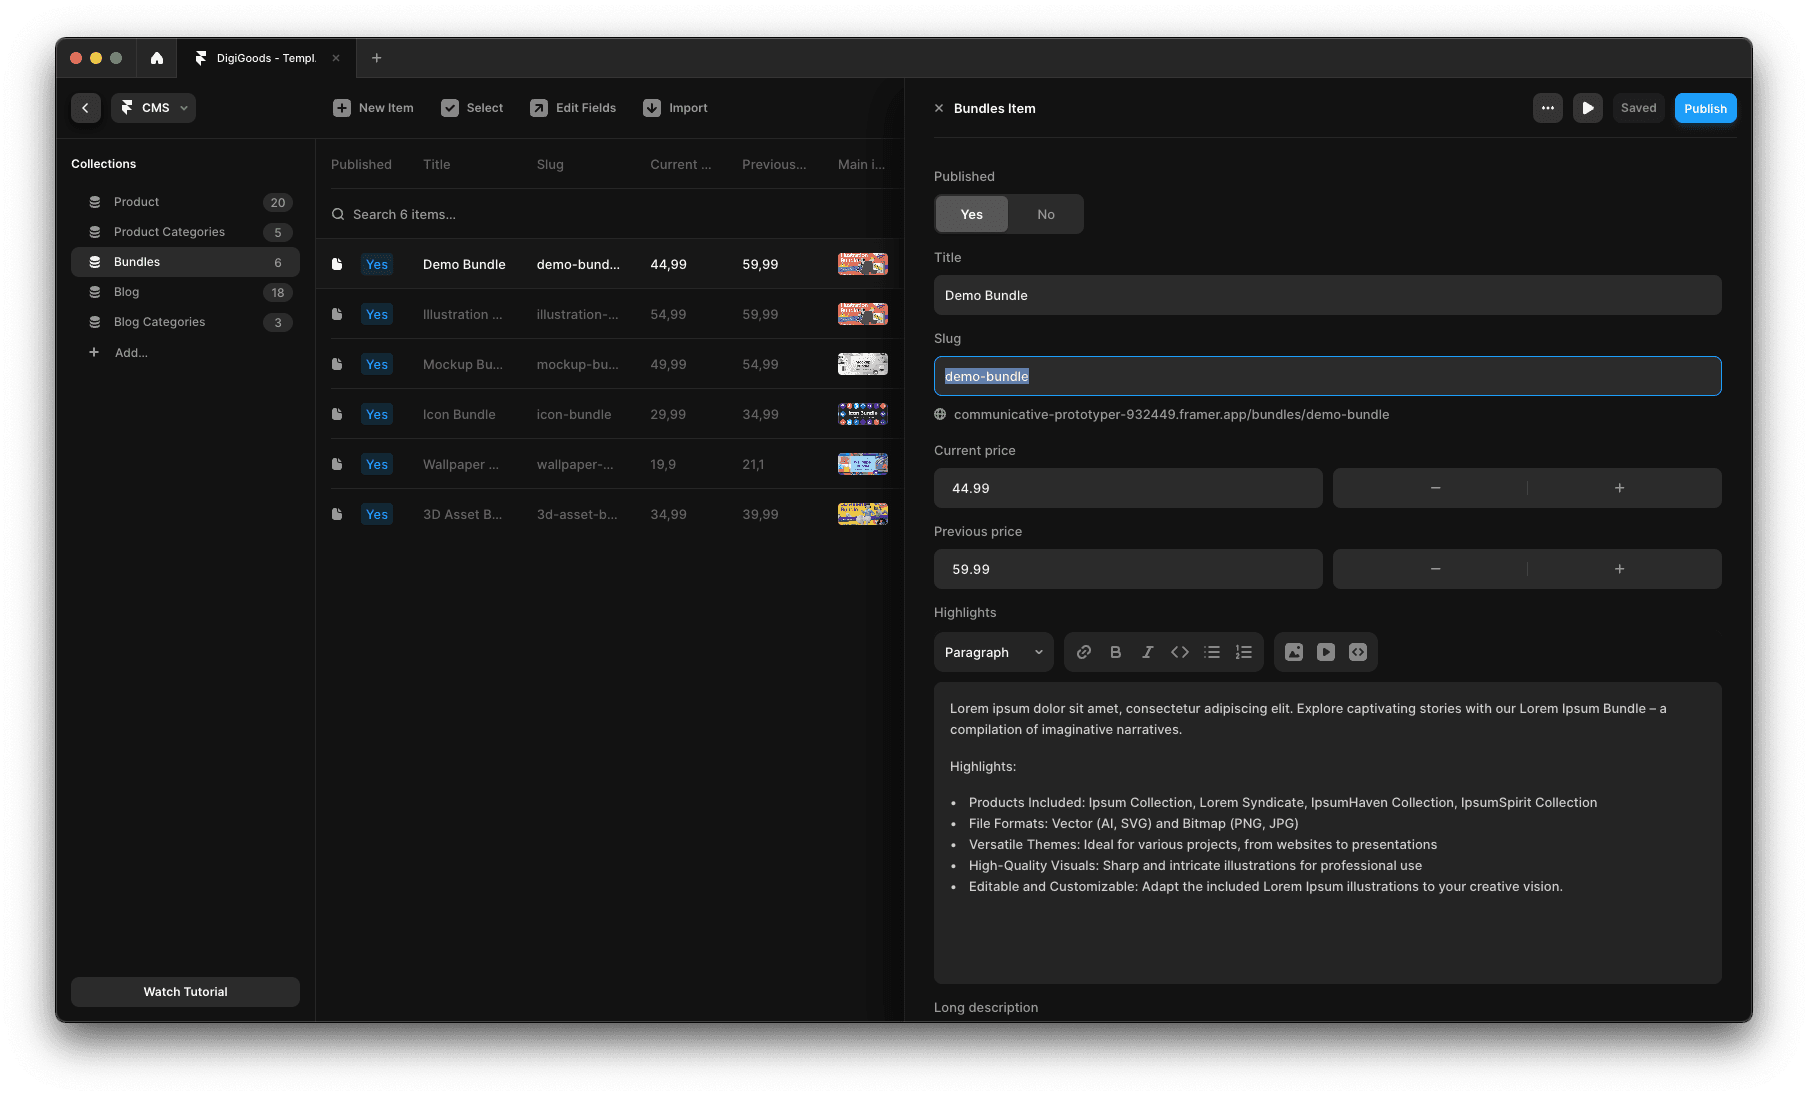
Ensure you have at least one item in the CMS collection named Bundles.
Copy the slug of the desired bundle.
Paste it into the Bundle field of a product.
Visit the bundle page to confirm that the product appears there.

Initially we have a Bundle that does not include any products.
Copy the slug of the Bundle where you want to add a product.

Paste the slug in the Bundle field of the intended product.

The product will now be listed in the Bundle.
Categories
Product categories leverage advanced Framer CMS functionality to dynamically list products by category.
By streamlining navigation and enhancing user experience, product categories simplify backend management, promoting efficient organization and discovery.
How to add a product to a category
Ensure you have at least one category in the CMS collection named Product Categories.
Copy the slug of the desired category.
Paste it into the Category field of a product.
Visit the category page to confirm that the product appears there.
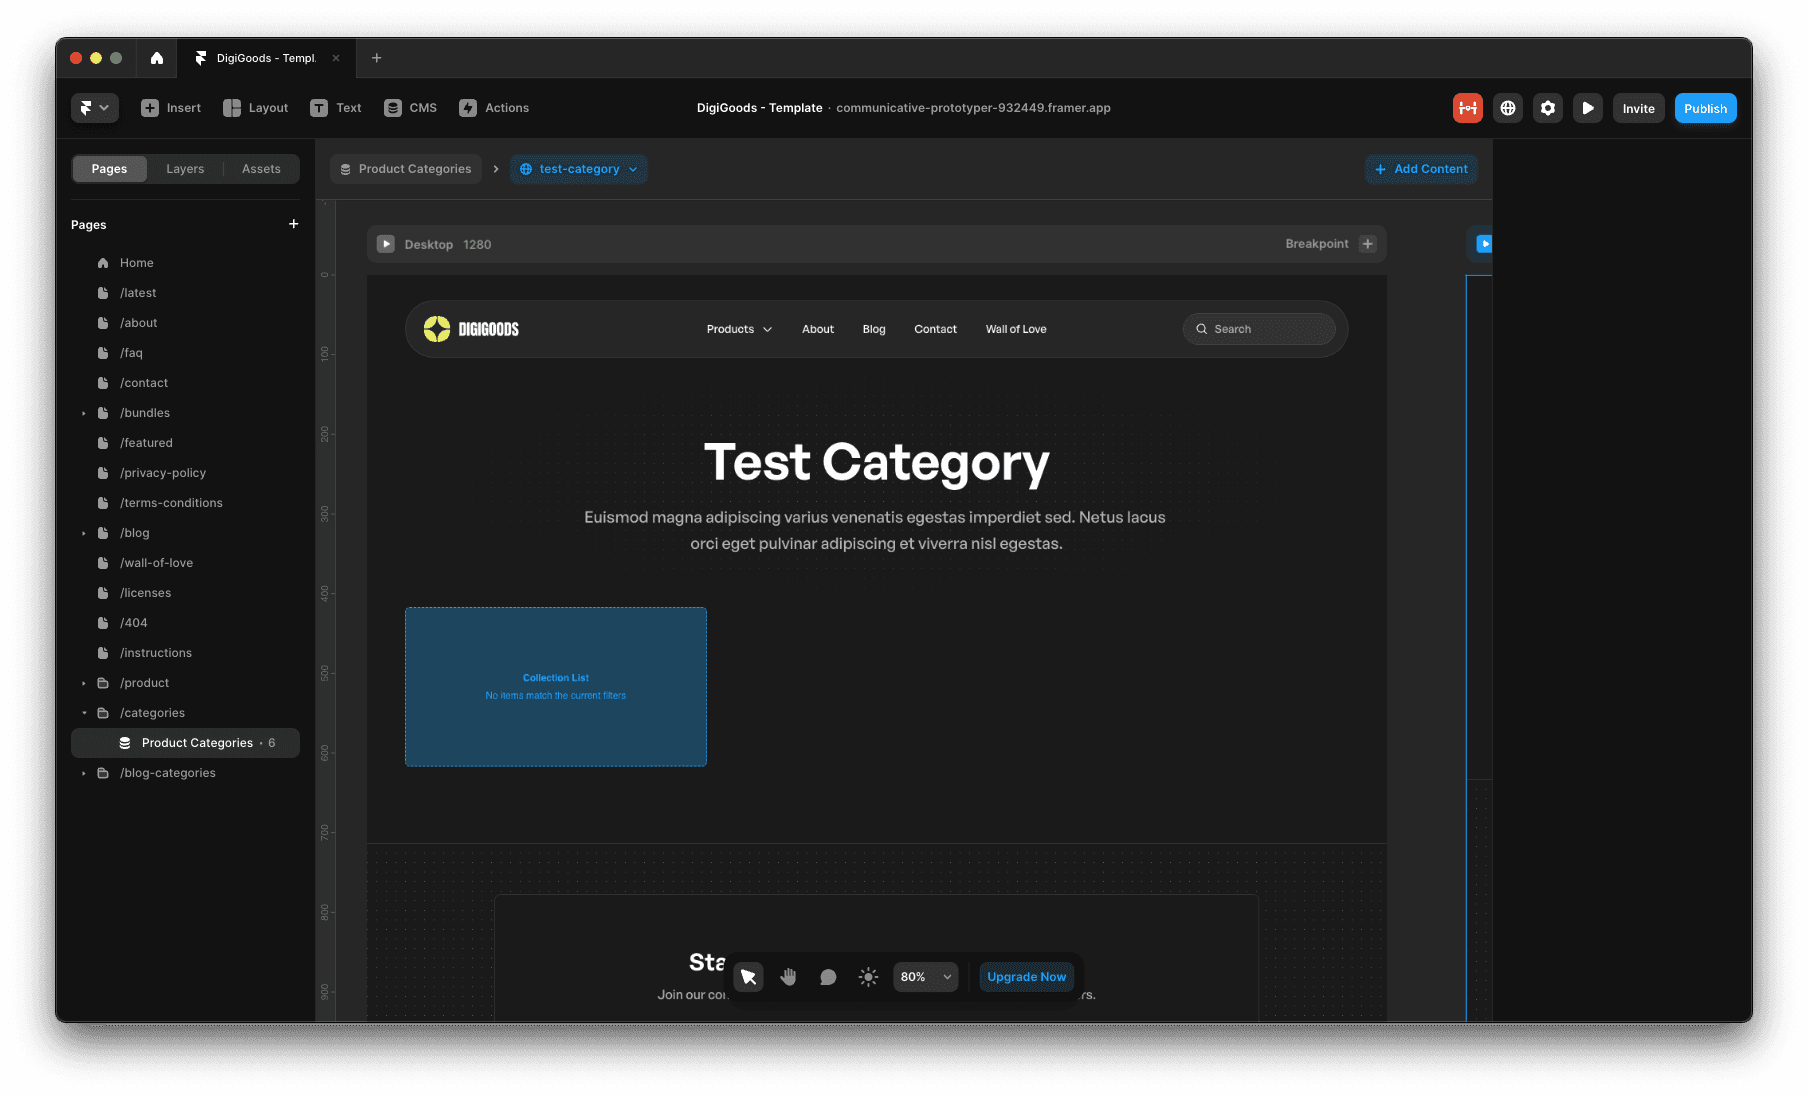
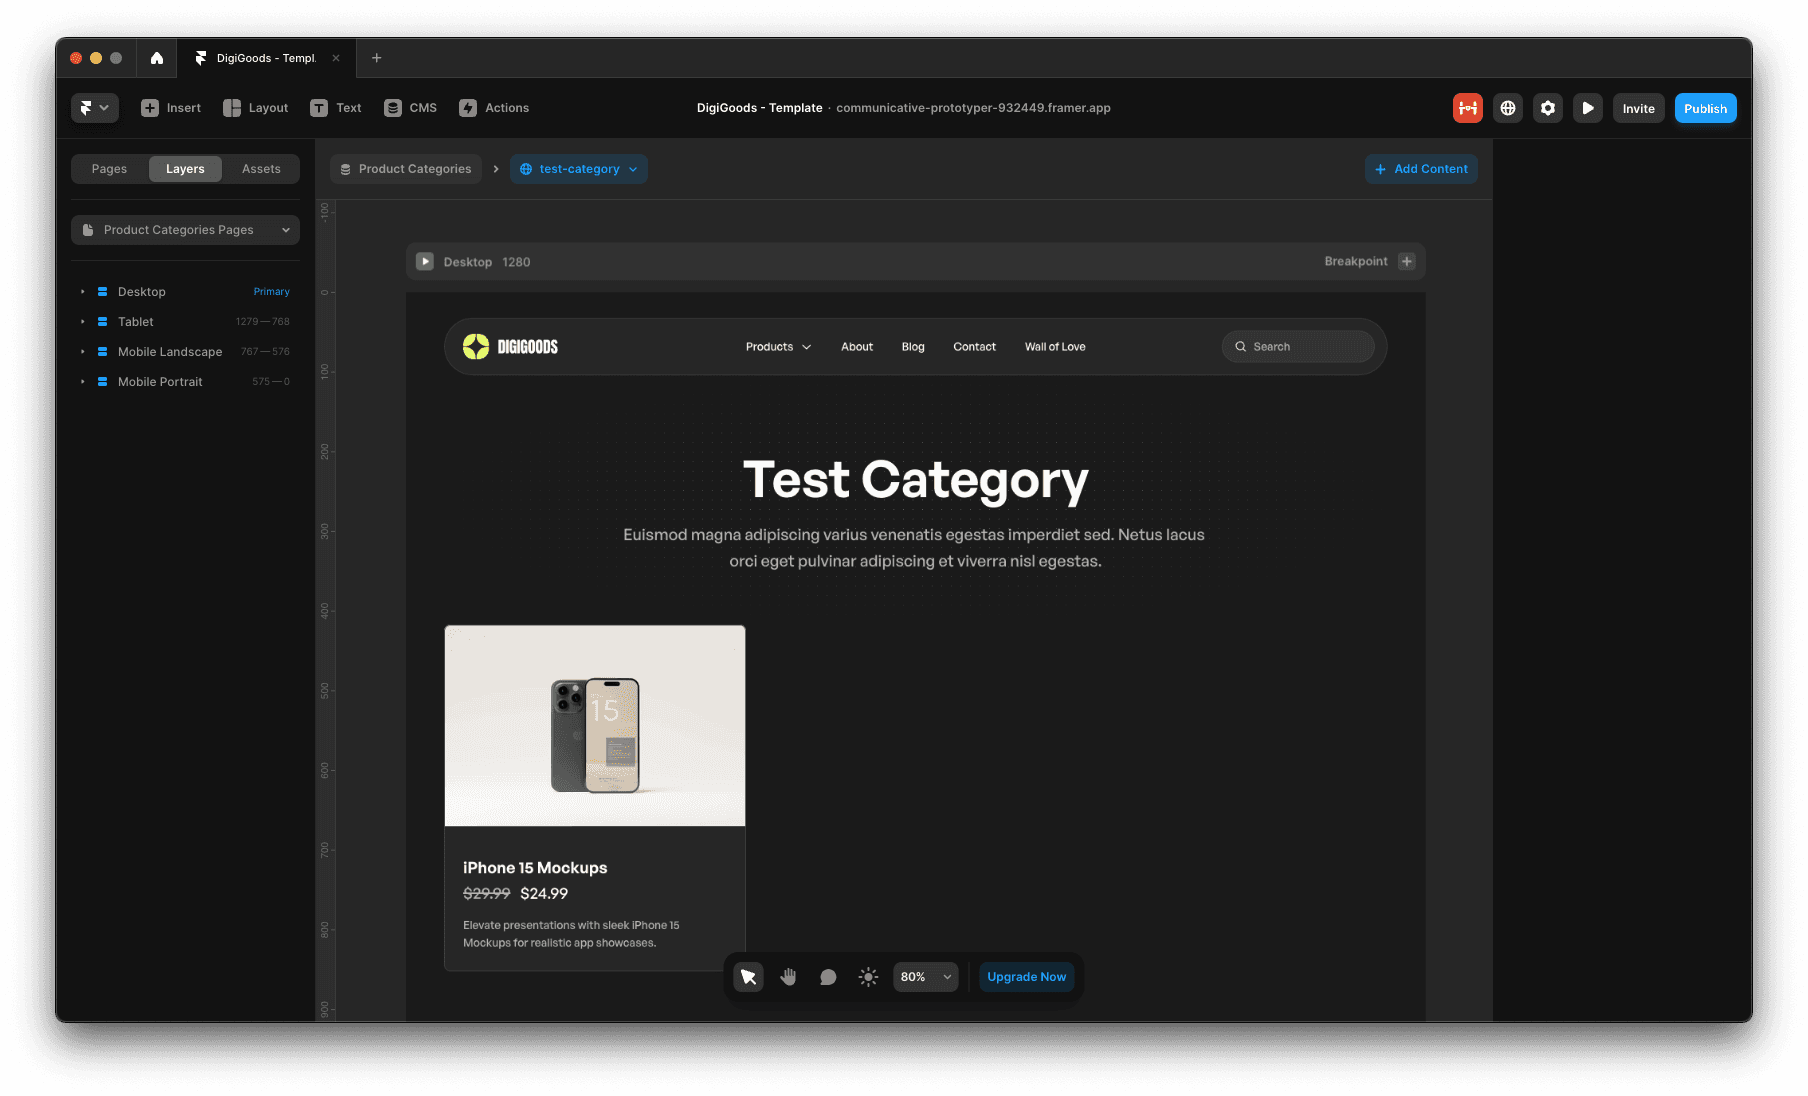
Initially we have a Category that does not include any products.

Copy the slug of the Category where you want to add a product.

Paste the slug in the Category field of the intended product.

The product will now be listed in the Category.
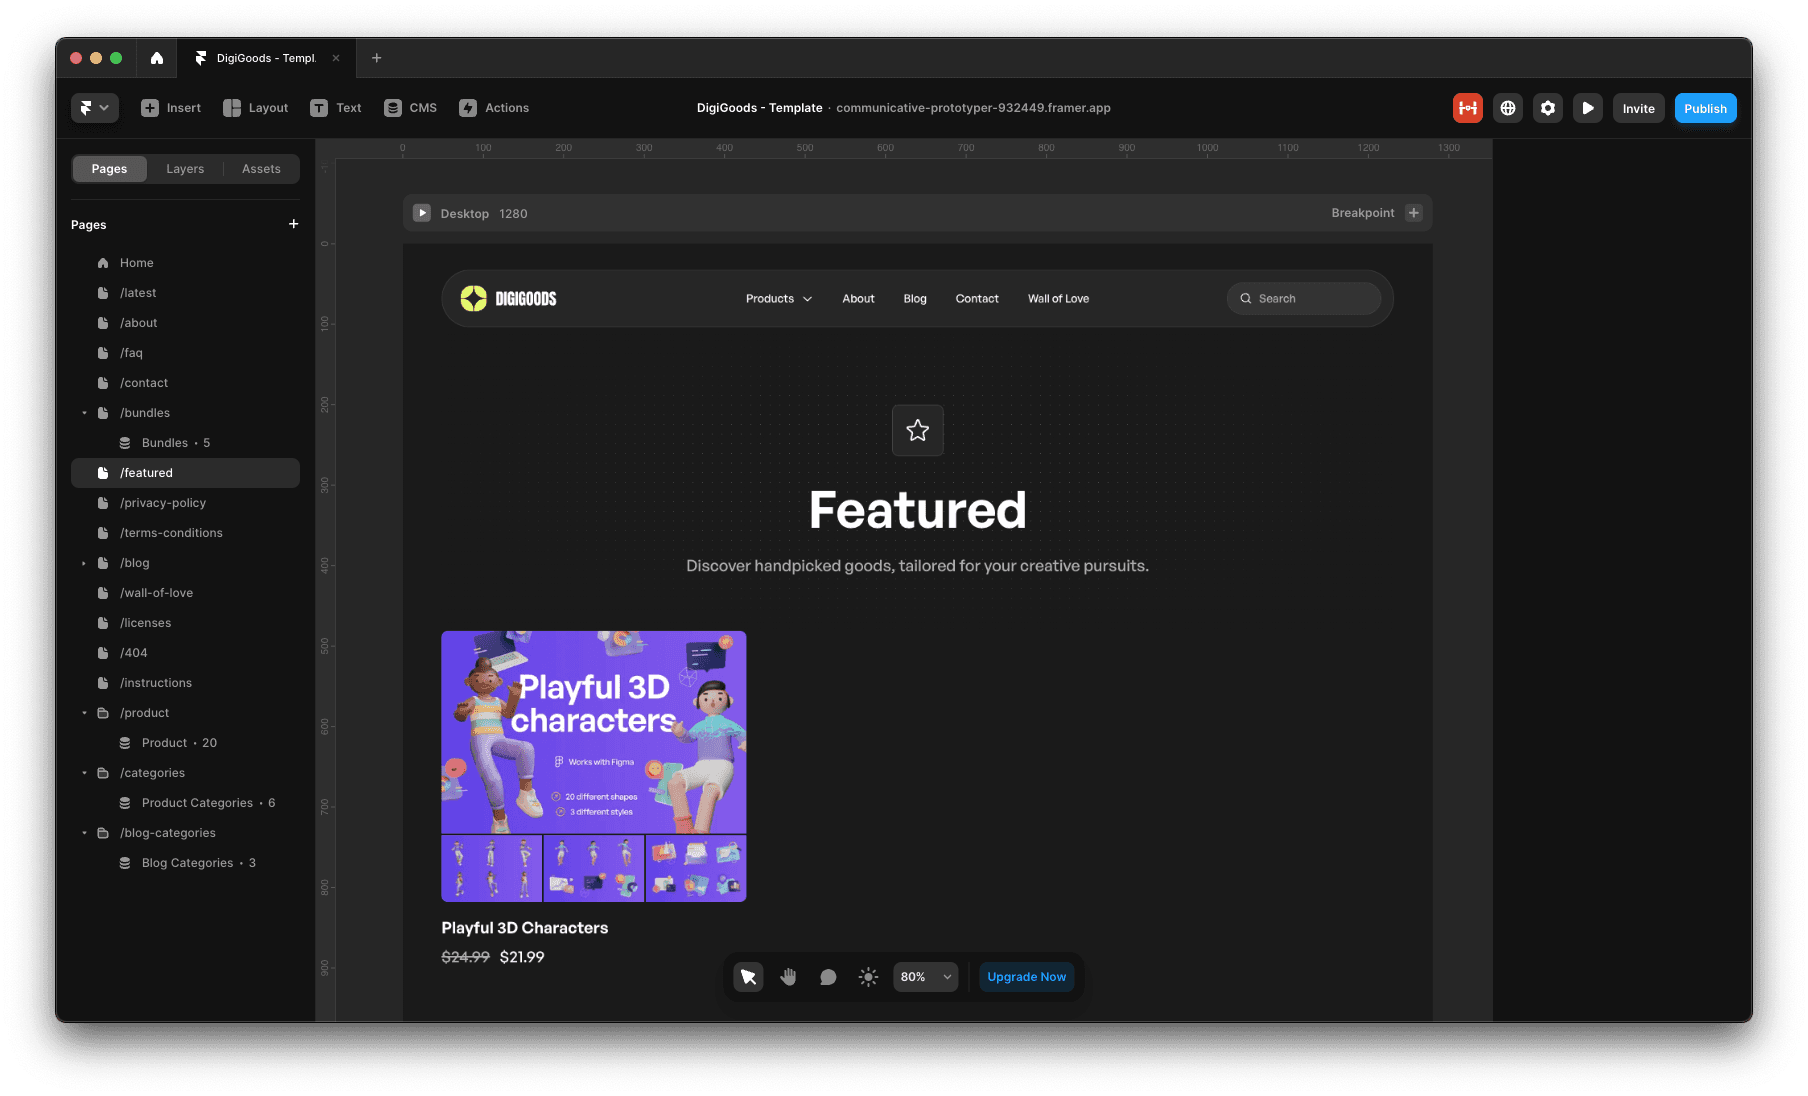
Featured products
The DigiGoods template includes a page (/featured) for listing featured products, enabling you to highlight items from different categories in your store.
How to highlight a product
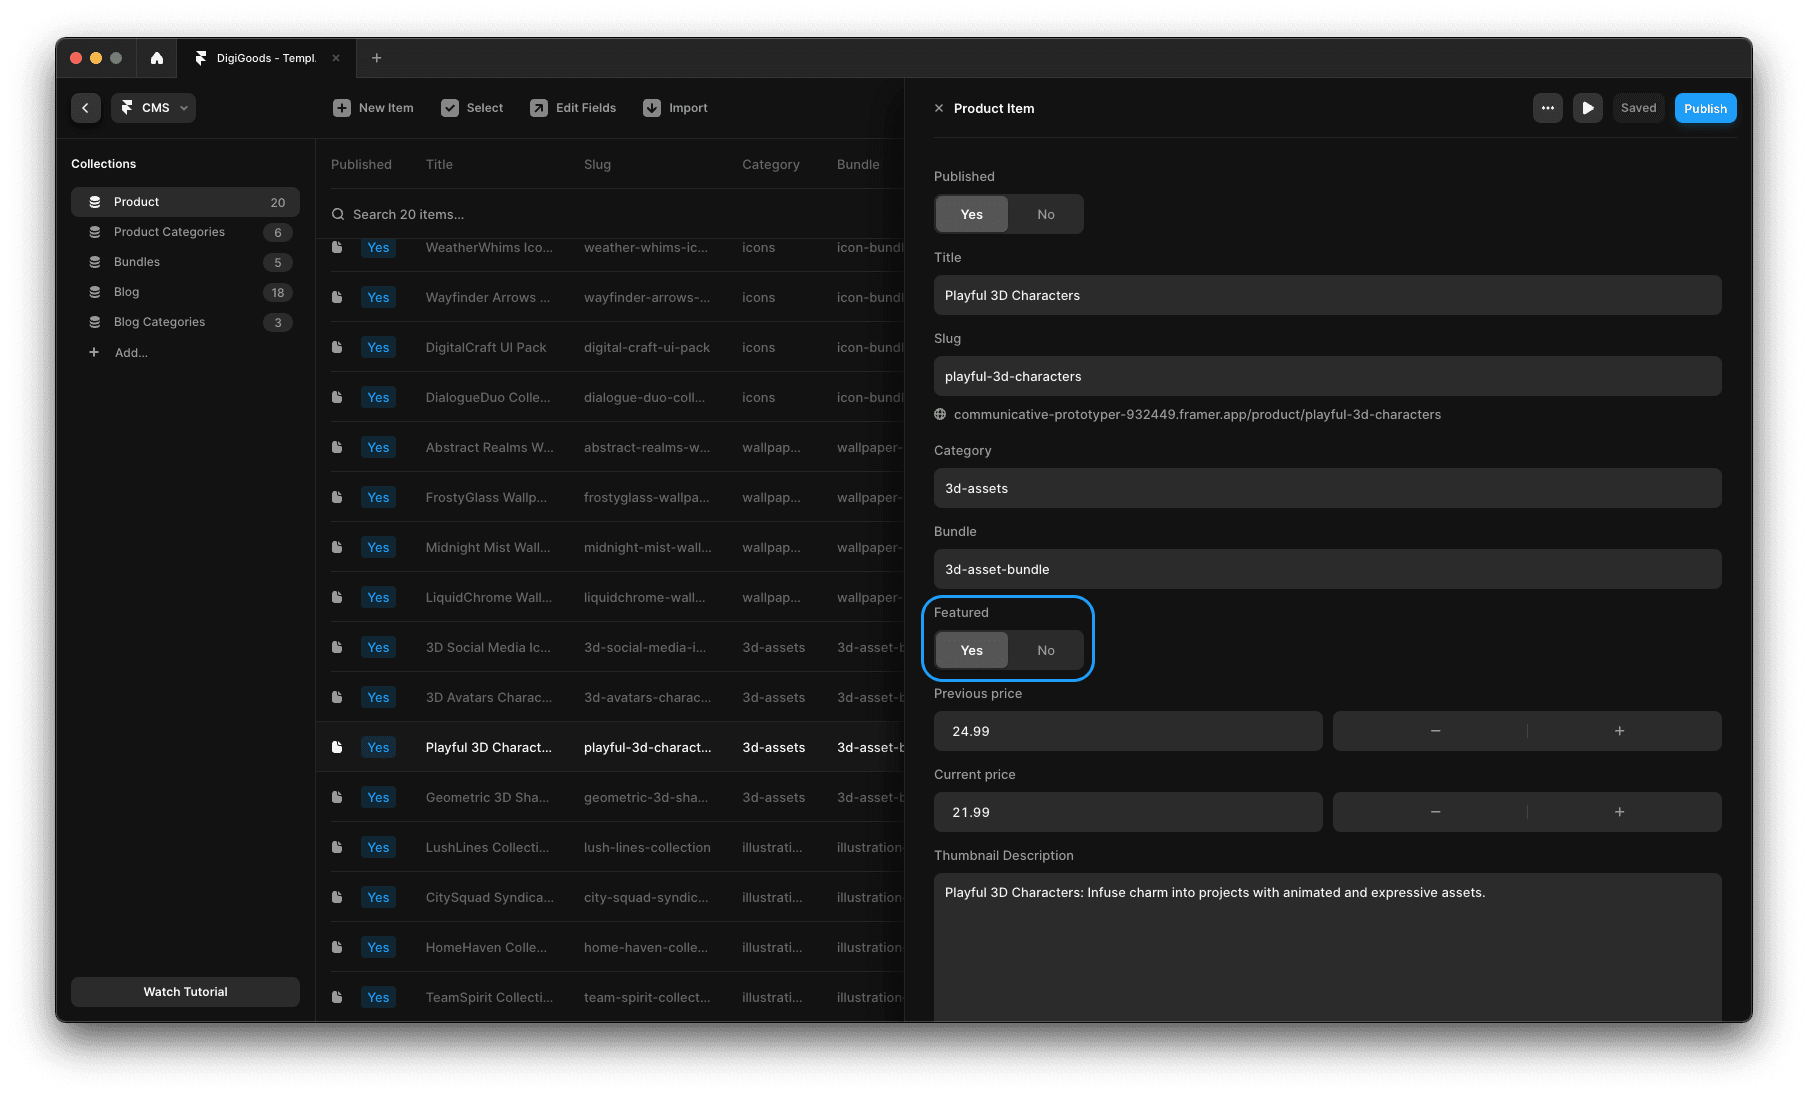
Locate the desired product in the CMS section.
Enable the switch on the Featured field.
Visit the /featured page to confirm that the product is listed.
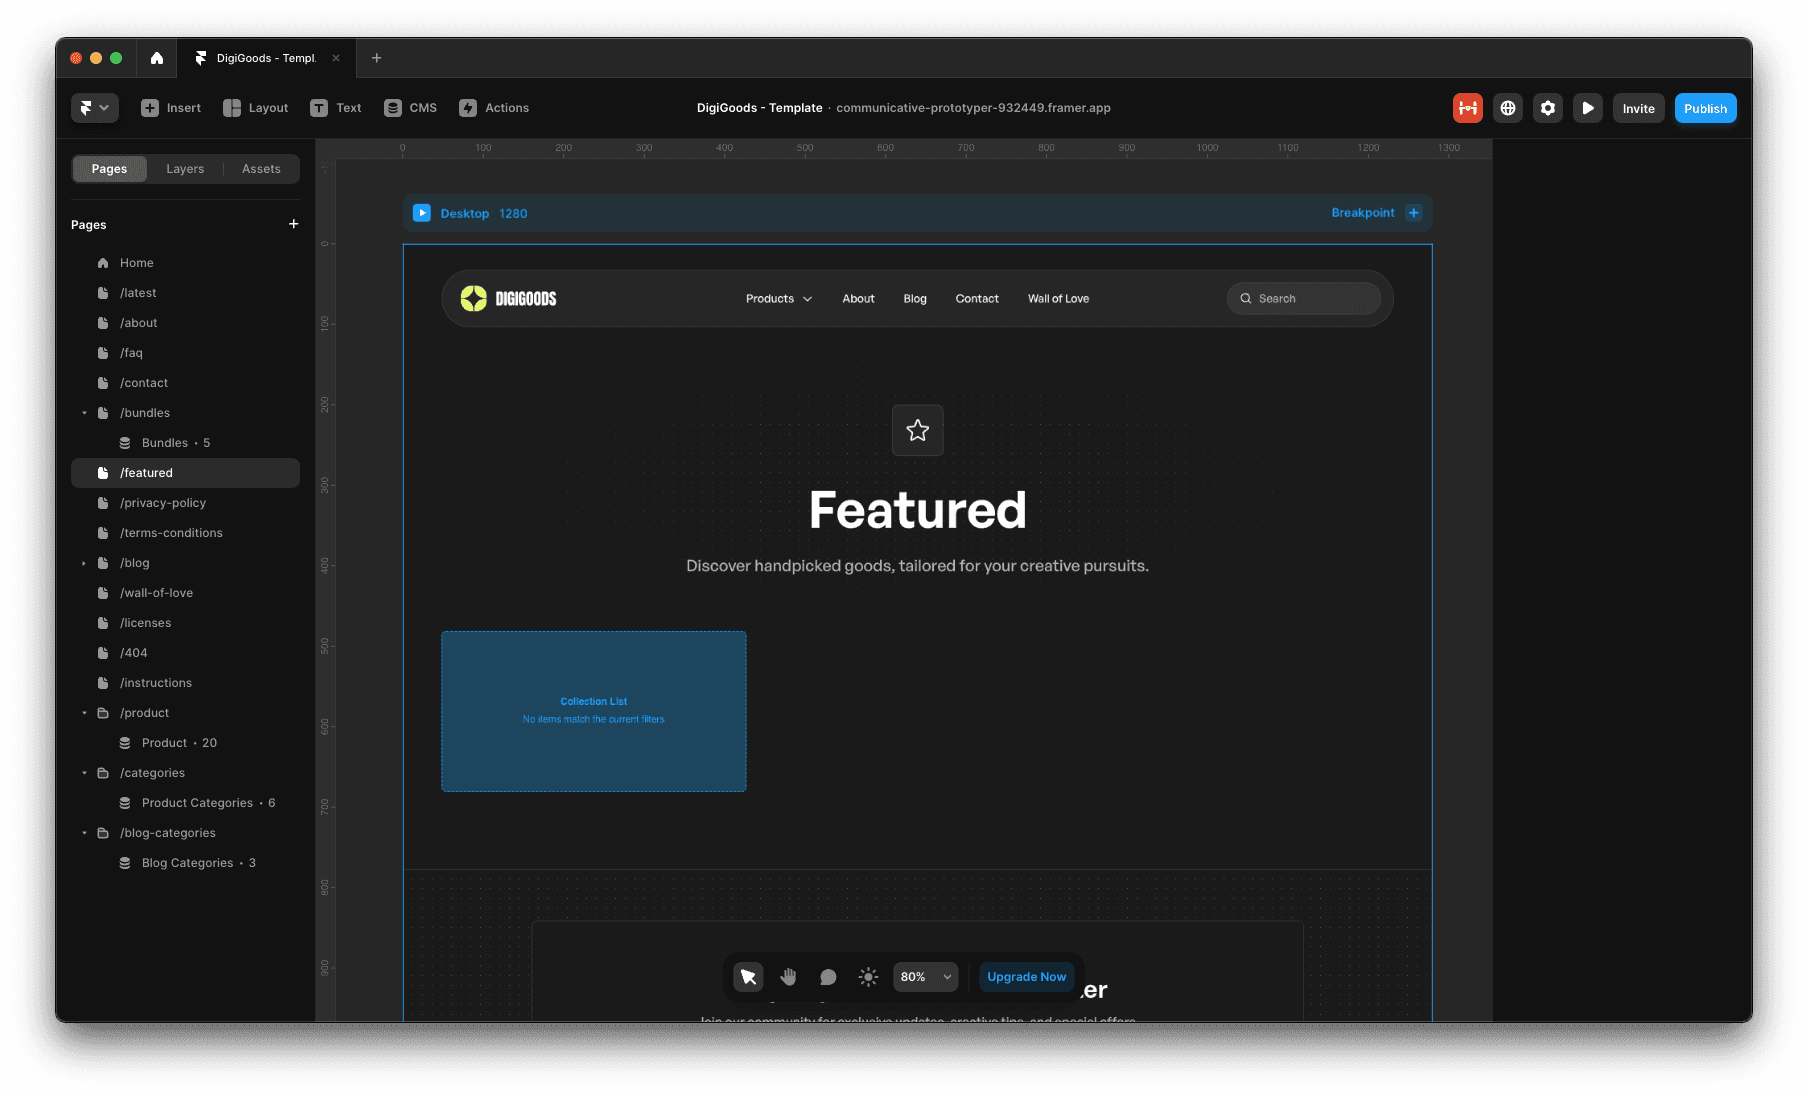
This is how the /featured page is displayed when there is no featured product.
Select a product and make sure to enable the Featured field switch.
The product will now be listed in /featured page.
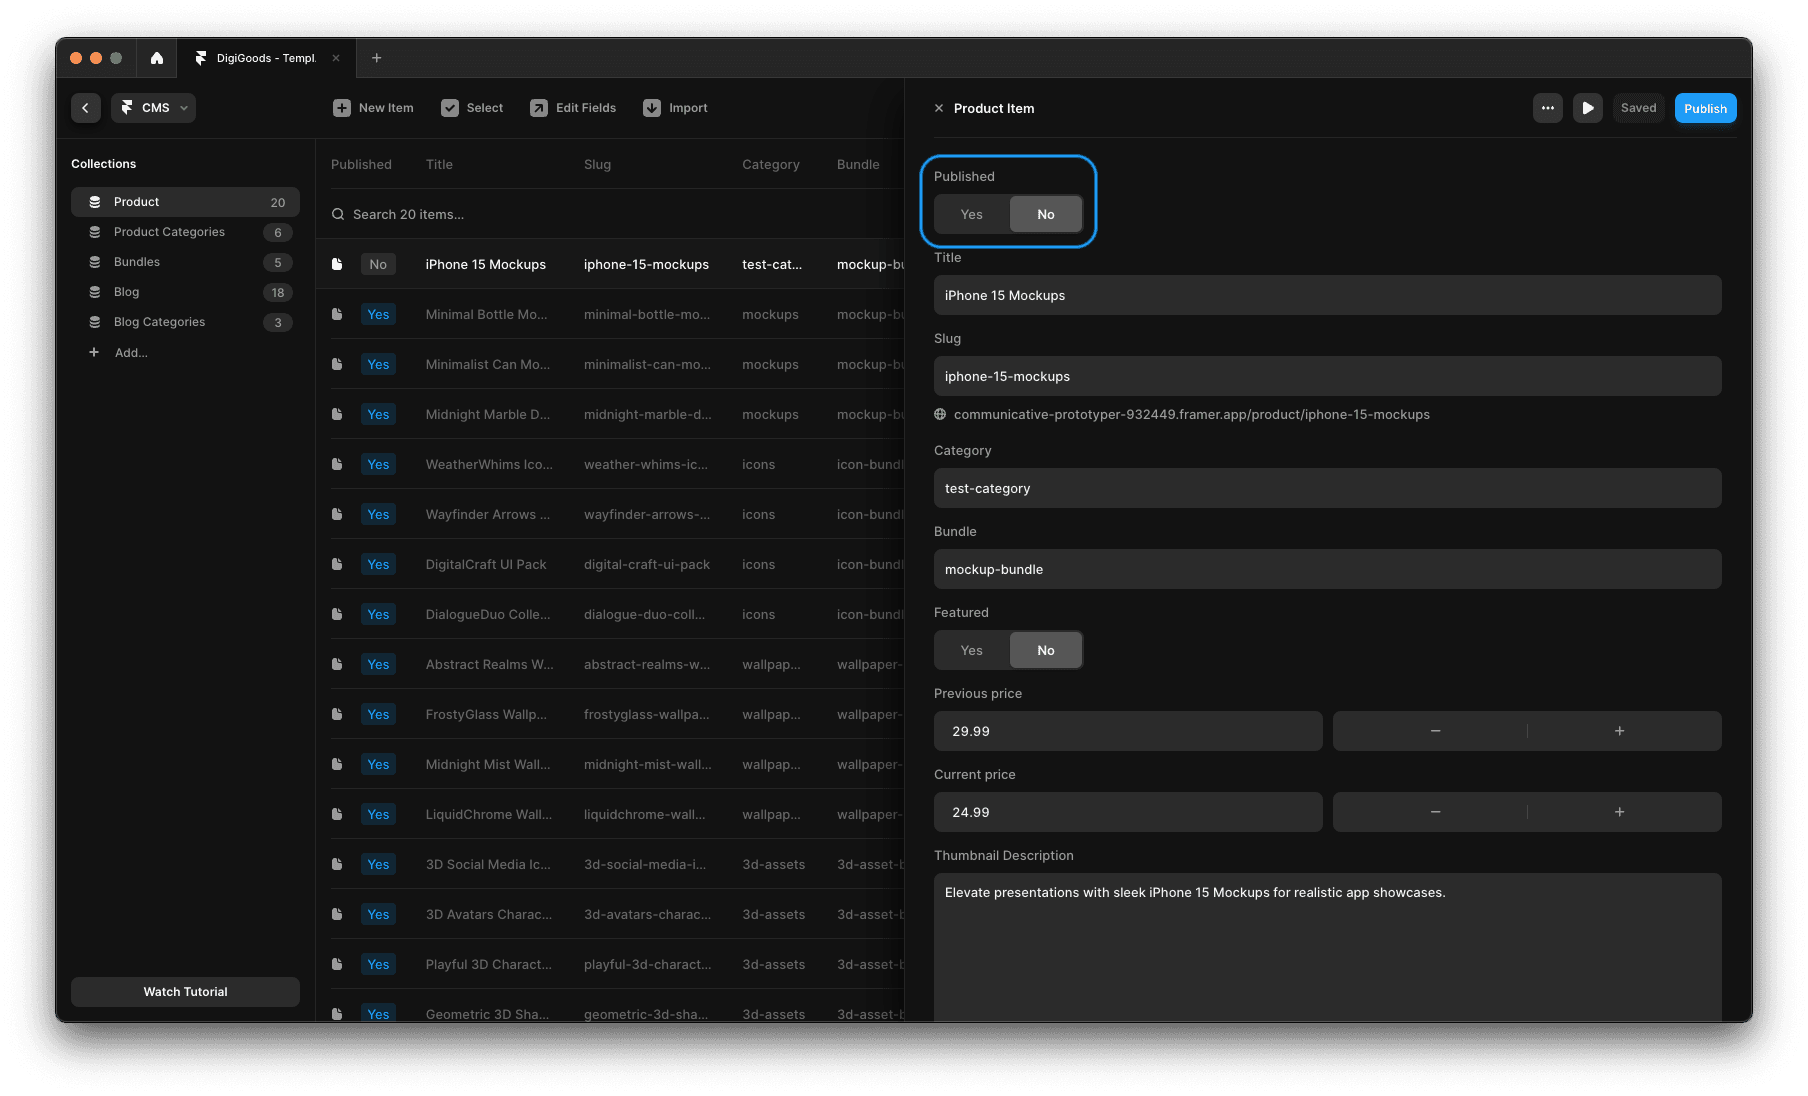
Publish or unpublish products
This feature allows you to work on products in the CMS section without them appearing in your project until you're ready.
How to publish or unpublish a product
Locate the desired product in the CMS section.
Enable or disable the Published switch.
Confirm that the product is shown or hidden from the appropriate listings.
Initially we have a product published in a Category.
Edit the product and make sure to disable the switch in the Published field.

The product will no longer be visible.
Embedded or link checkout
Embedding external checkouts like Lemon Squeezy or Gumroad on product pages streamlines purchasing and maintains brand consistency.
While the DigiGoods template embeds the checkout by default, there are some issues with Lemon Squeezy in certain browsers.
Alternatively, you can choose to open the checkout in a new tab via a link.
How to display the checkout in a new browser tab
Ensure every product and bundle have a valid URL in the Link to Purchase (Link) field.
Go to the CMS Product Pages and Bundle Pages.
Locate instances of the Buy Button - Overlay component visible at the Desktop breakpoint. Hide it and make the Buy Button - Link component visible instead.
Repeat for other breakpoints if necessary.
Confirm that clicking Buy now opens the checkout in a new browser tab.
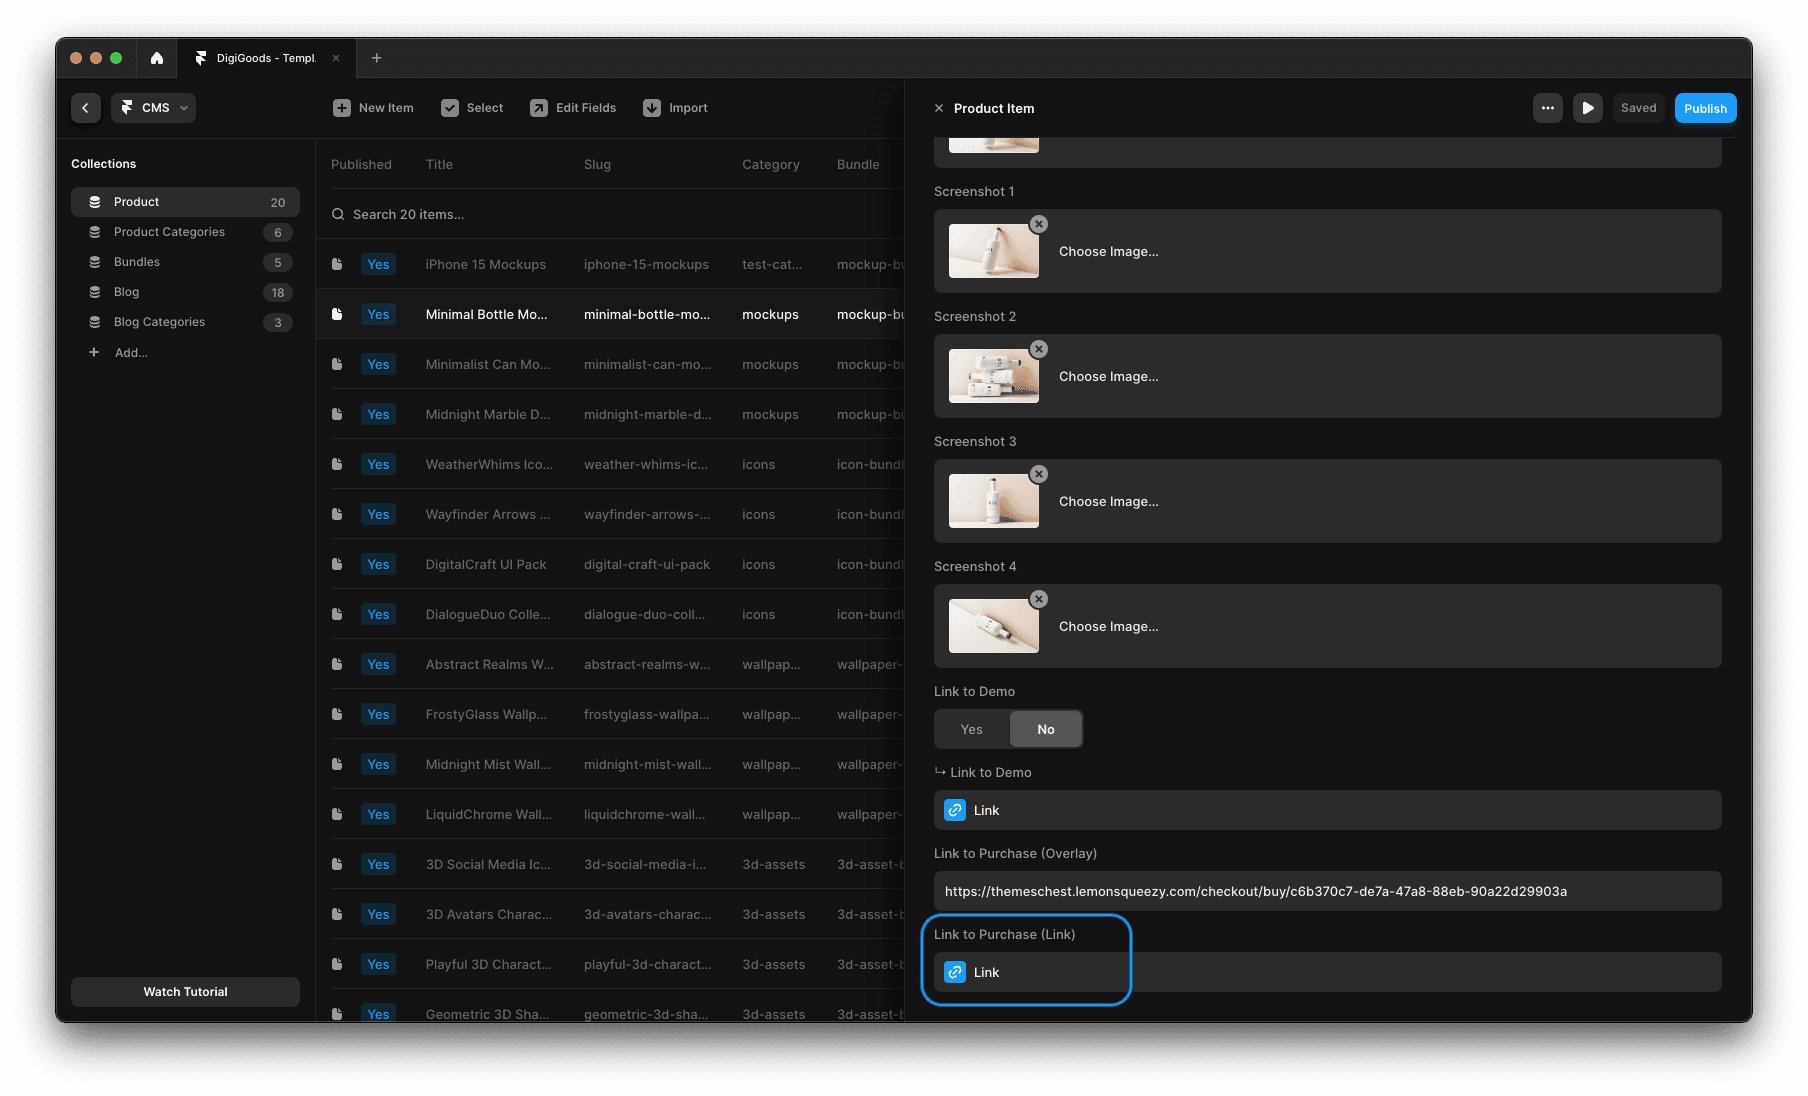
Ensure every product and bundle have a valid URL in the Link to Purchase (Link) field.
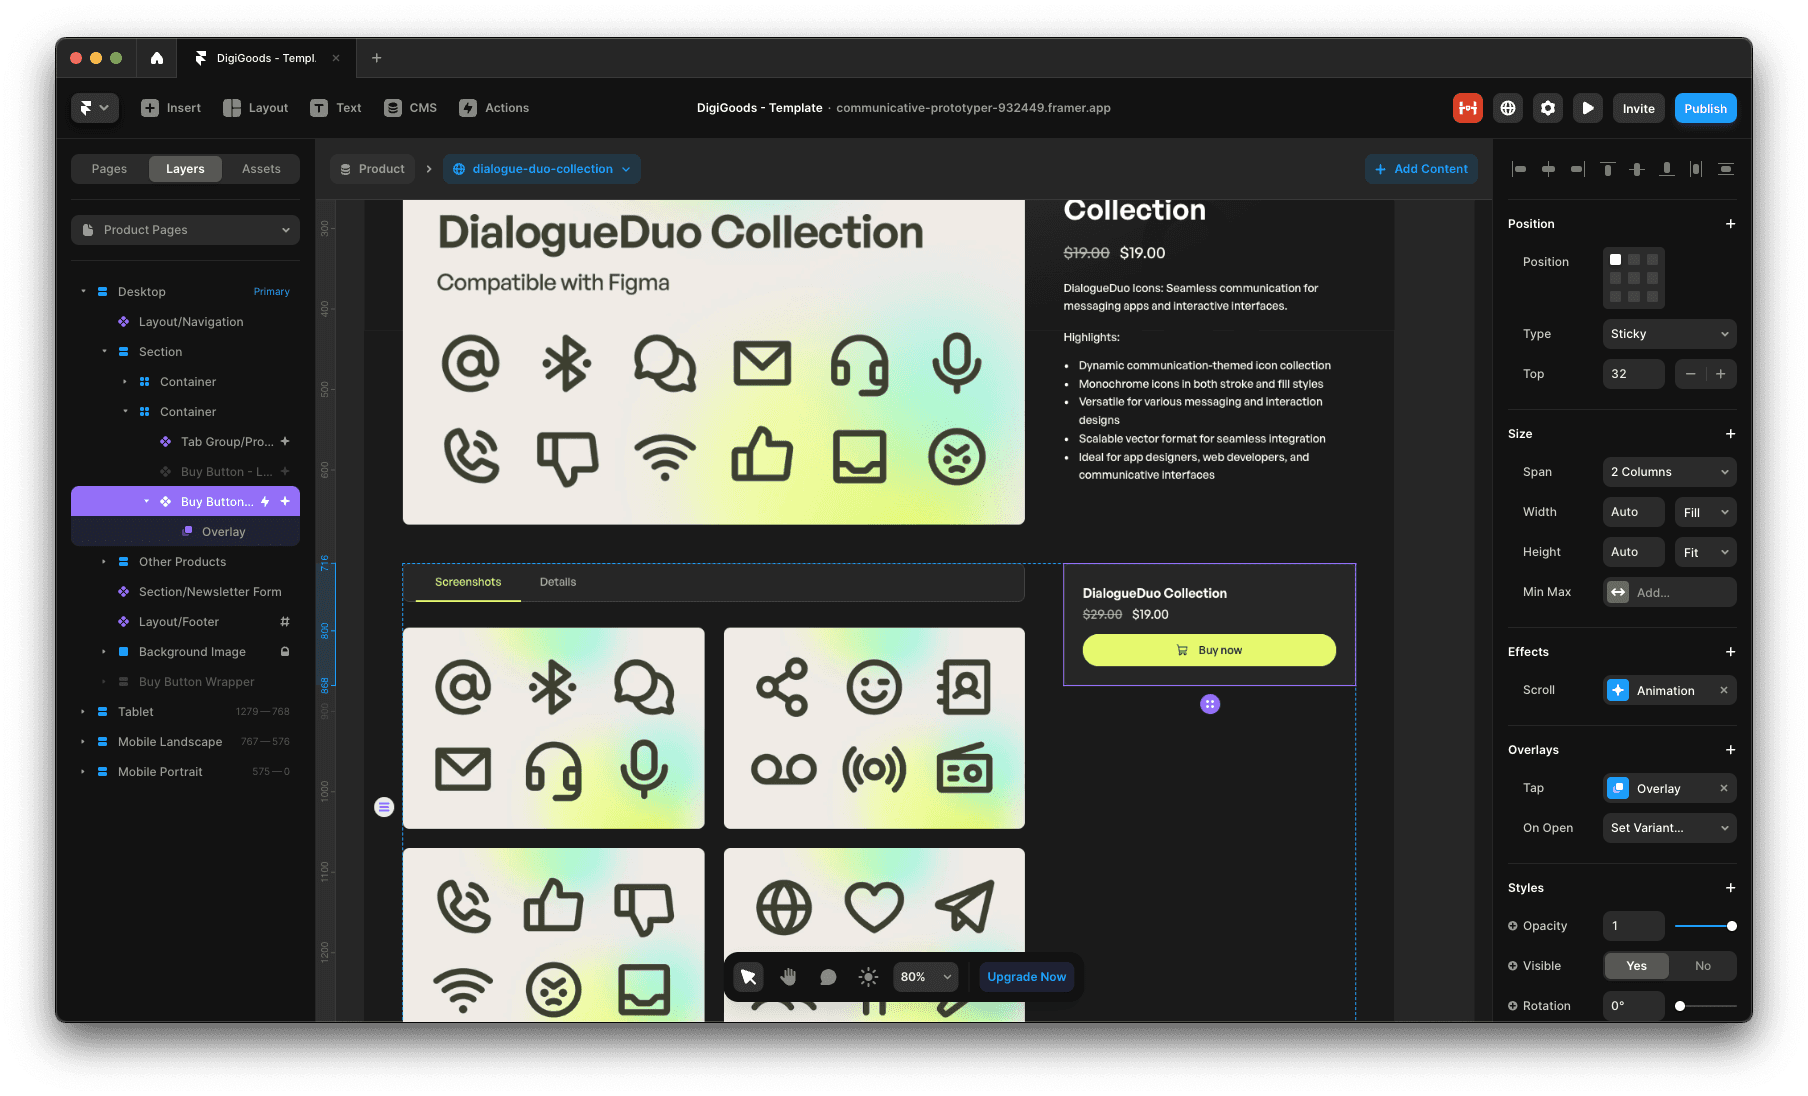
Locate the Buy Button - Overlay component instance on the product page. Where it is visible, hide it.
Next to the Buy Button - Overlay instance there is a Buy Button - Link one. Where it is hidden, make it visible.
Display a "View demo" button on product pages
For digital assets with demos, such as templates, you can display a "View demo" button on product pages.
How to display the "View demo" button
Locate the desired product in the CMS section.
Enable the Link to Demo switch.
Add the demo link in the ↳ Link to Demo field.
Confirm that the product page now displays the View Demo button after the Buy now button.
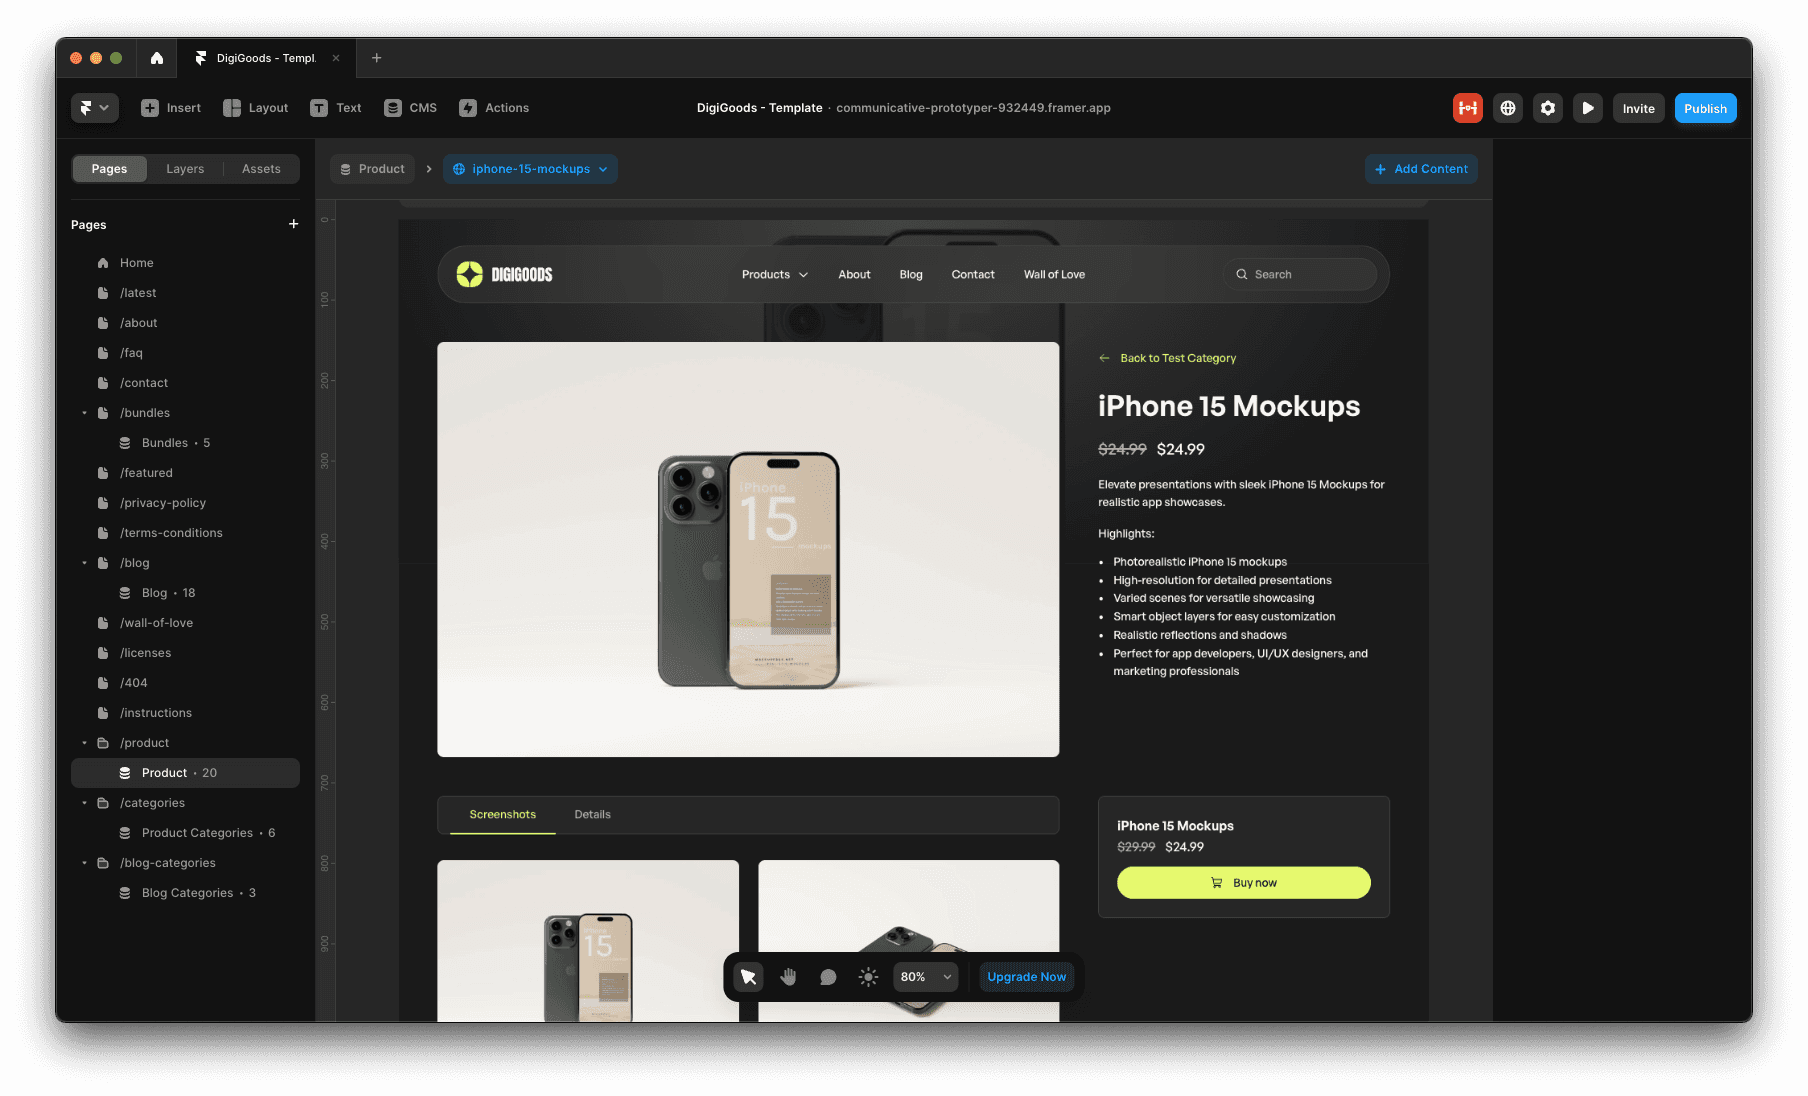
Initially the product only displays the Buy now button.
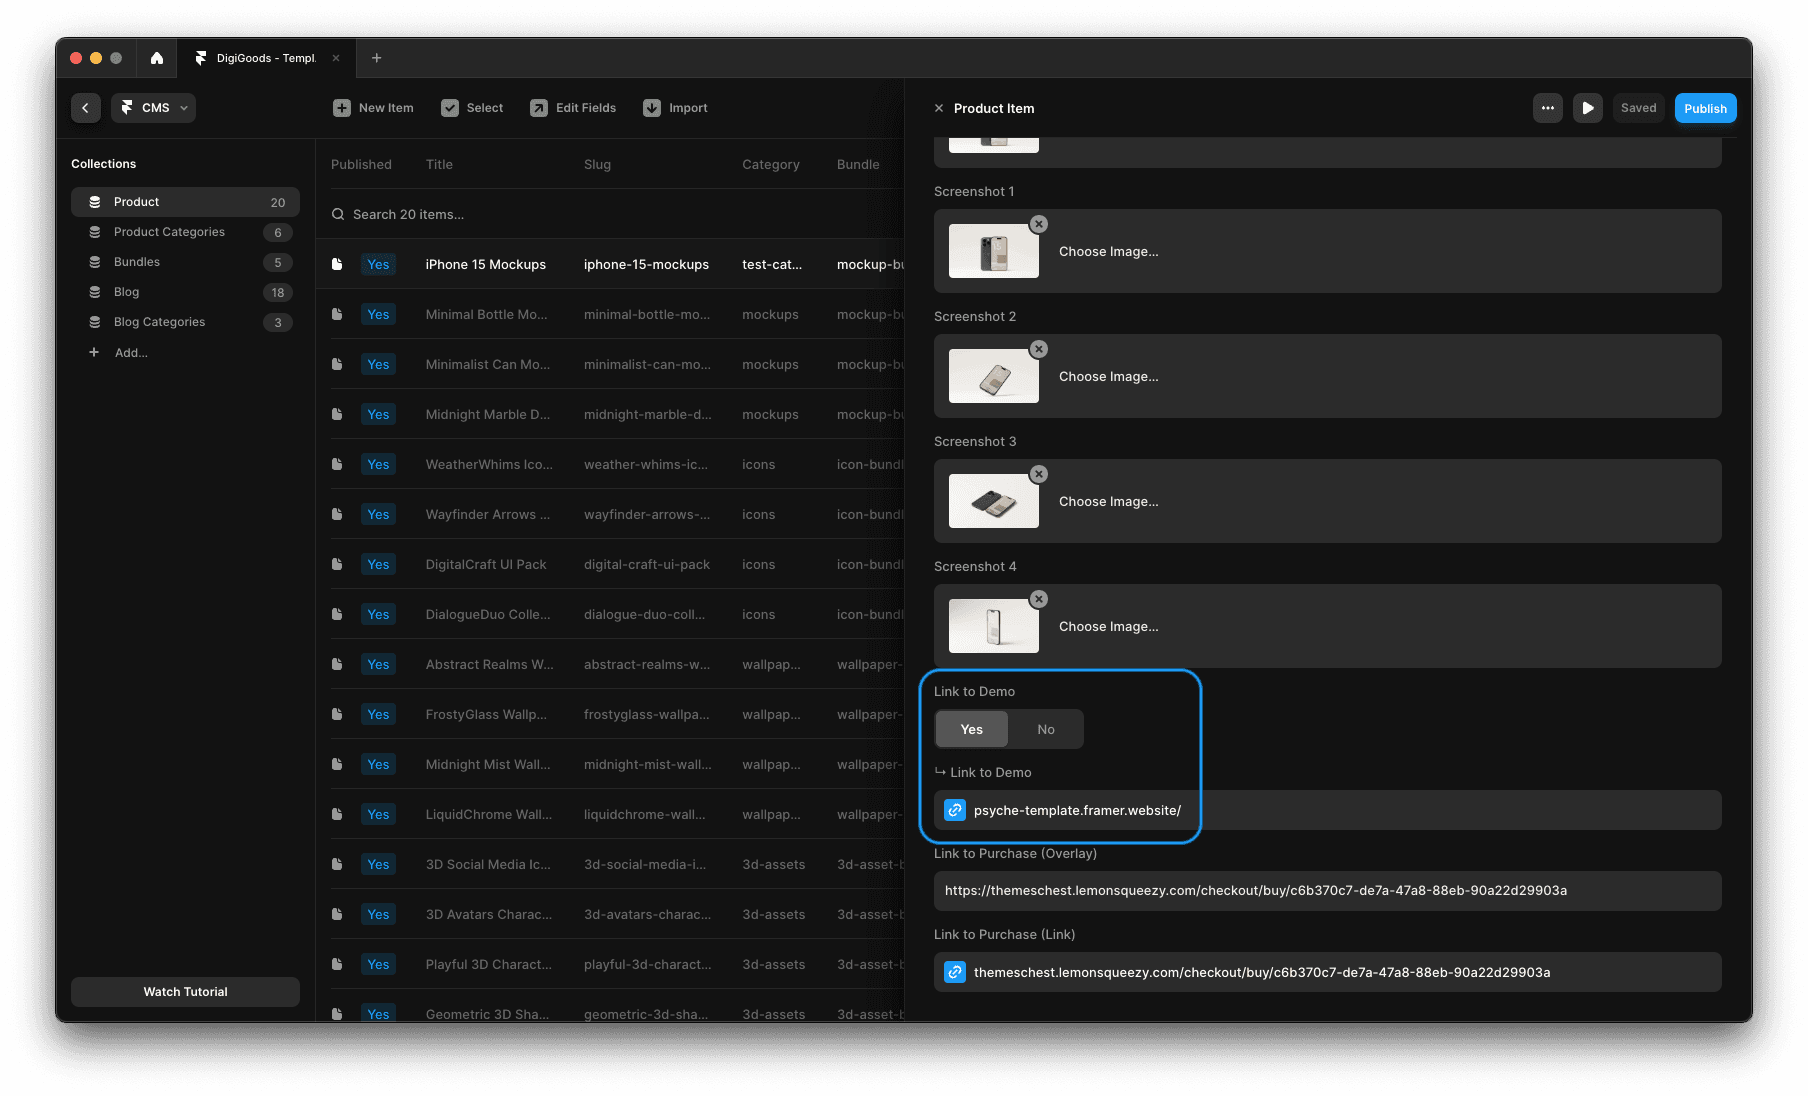
We edit the product making sure to enable the Link to demo switch and then enter a valid URL in the ↳ Link to demo field.

Below the Buy now button will appear the View demo button, which when clicked will open the provided link in a new browser tab.
Blog posts
Categories
Blog article categories dynamically list posts by category, enhancing navigation and backend management.
How to add a post to a category
Blog article categories dynamically list posts by category, enhancing navigation and backend management.
Ensure you have at least one category in the CMS collection named Blog Categories.
Copy the slug of the desired category.
Paste it into the Category field of a blog post.
Visit the category page to confirm that the post appears there.
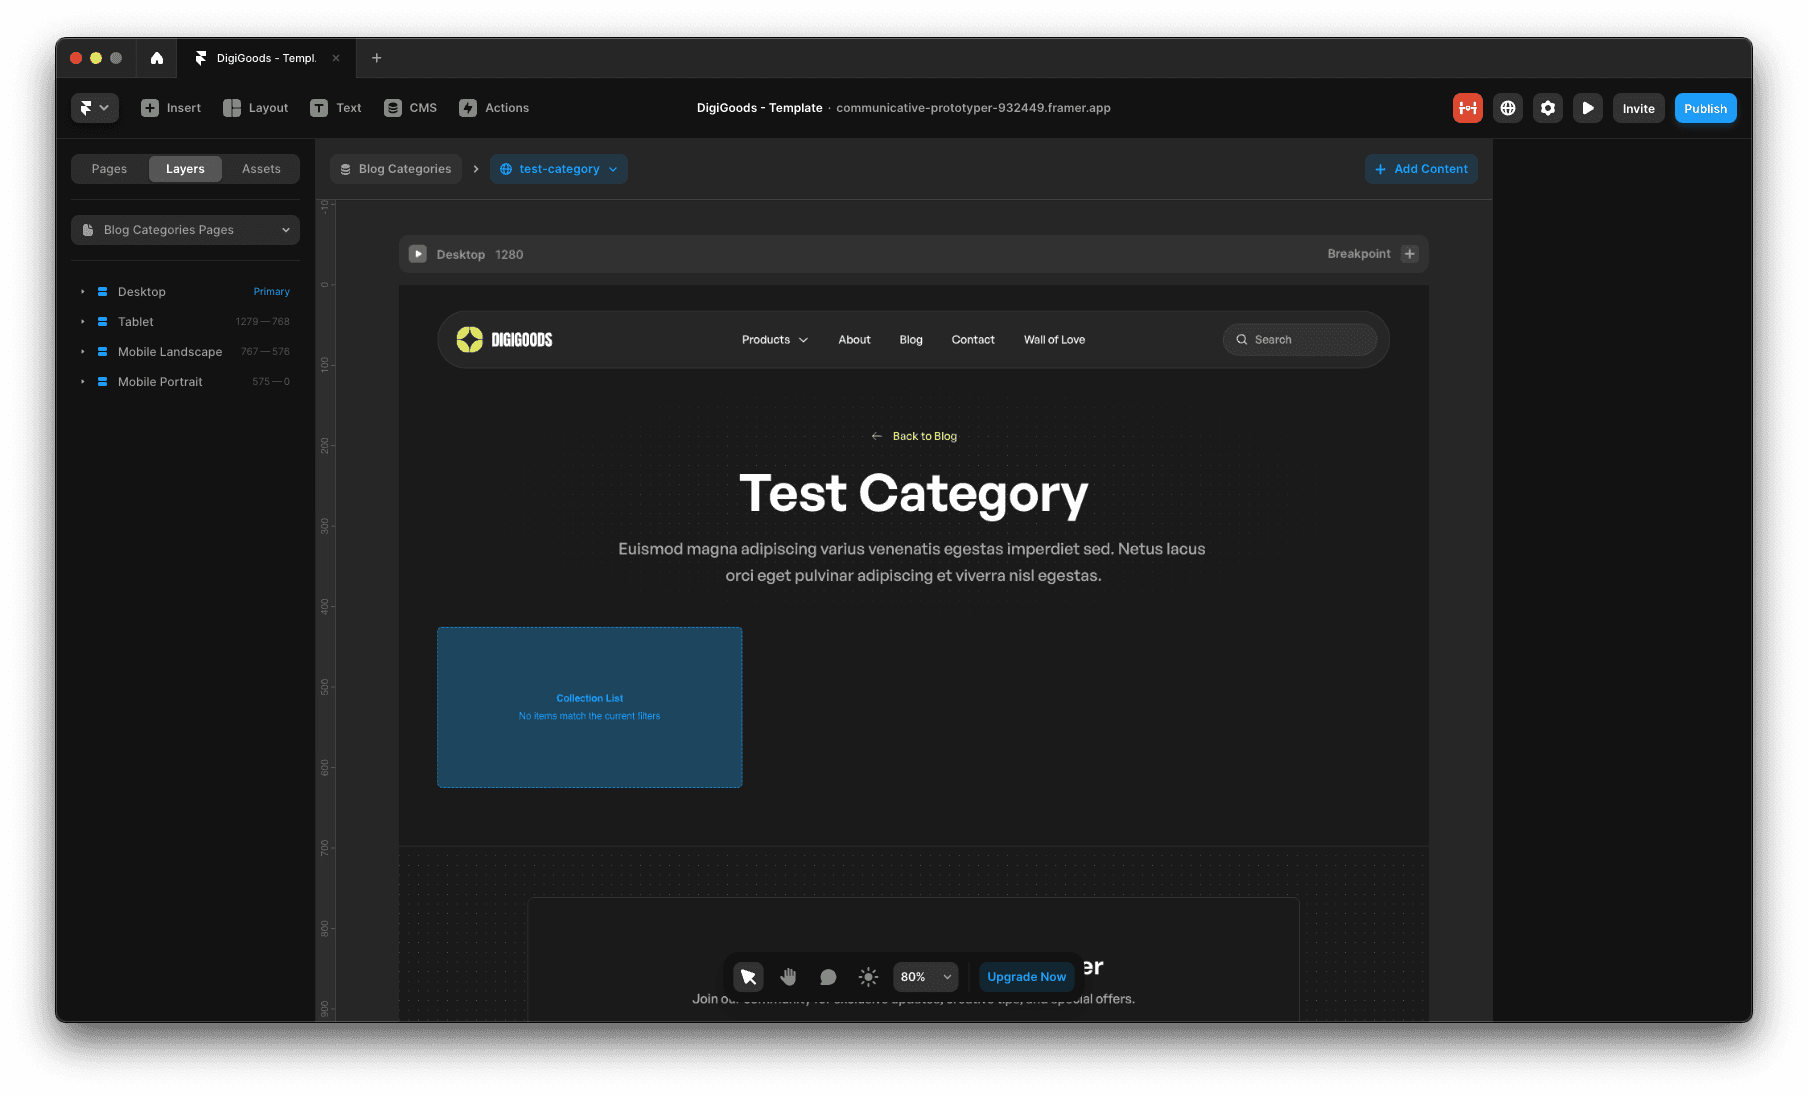
Initially we have a Blog Category that does not include any article.

Copy the slug of the Category where you want to add an article.
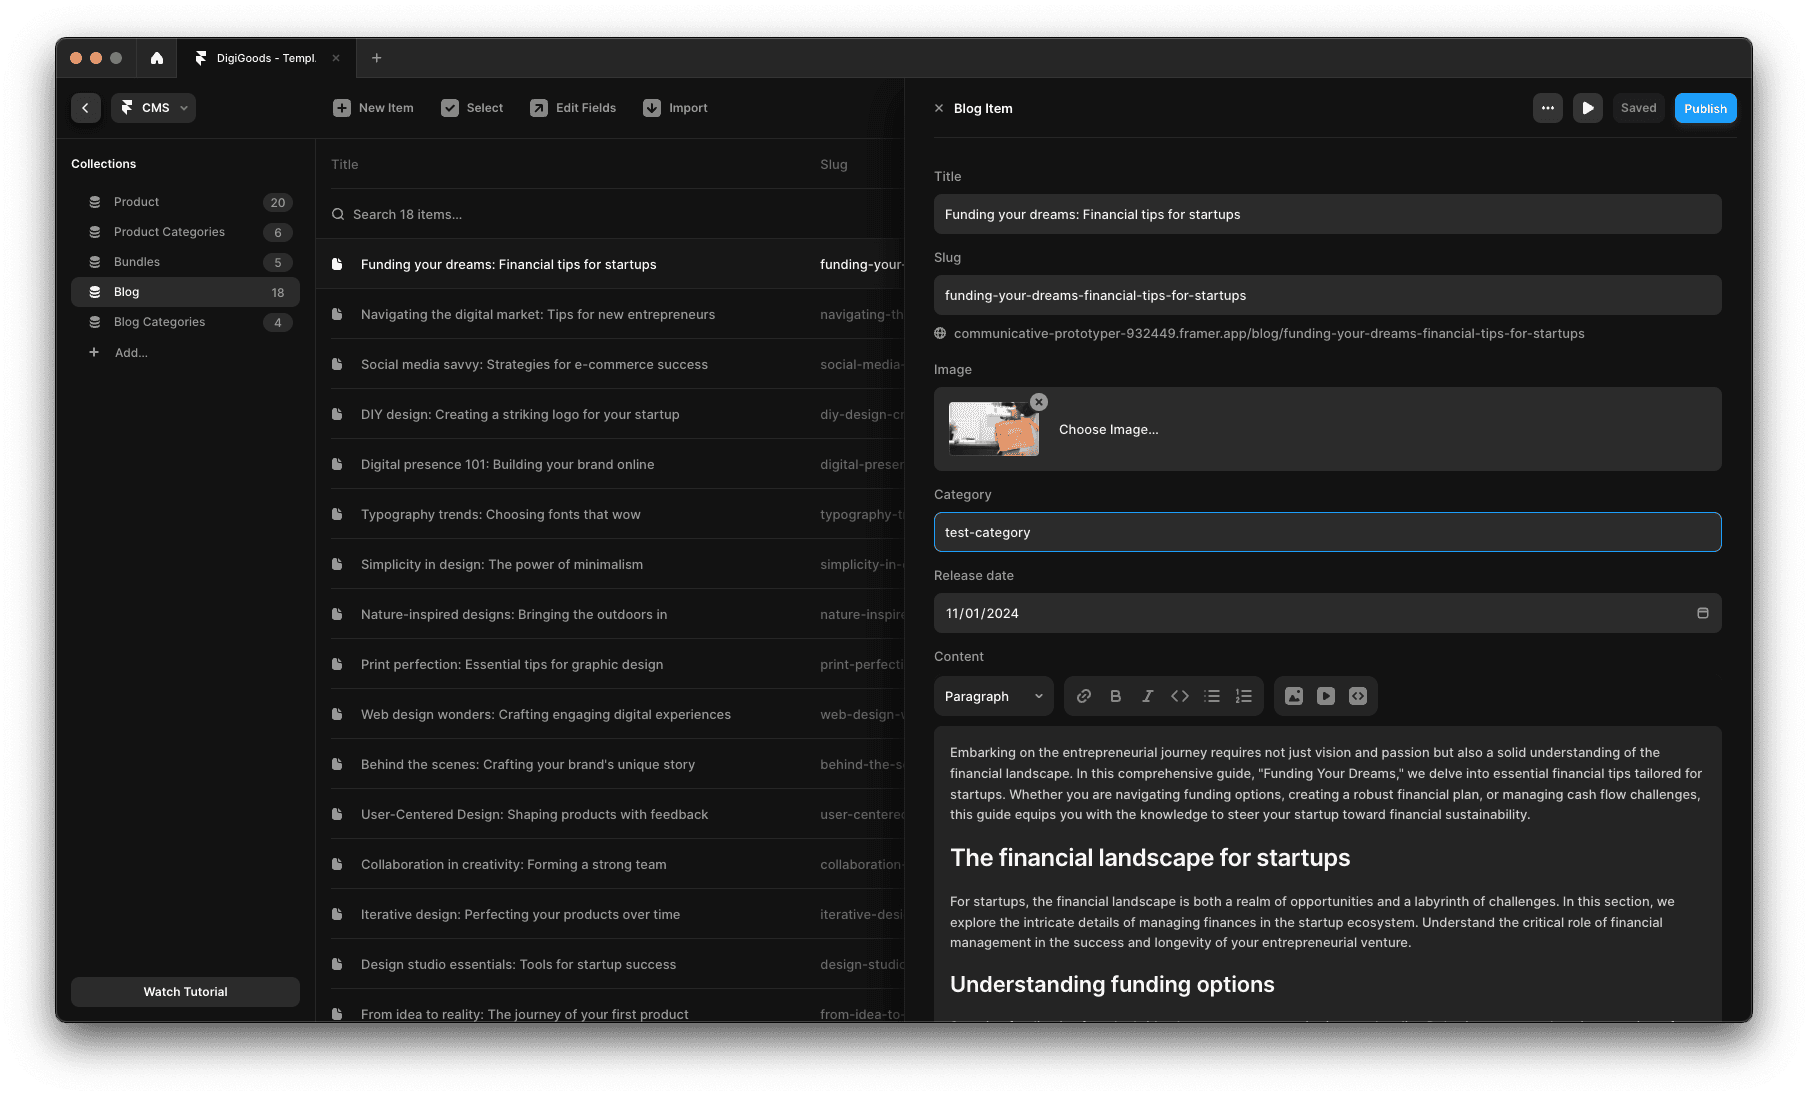
Paste the slug in the Category field of the intended article.

The article will now be listed in the Category.